Contact us for a 3D print quote:
tngrobot@gmail.com
Featured Robots
School programs that help teachers educate the next generation of students in robotics.
More robot workshops coming soon!
Dalhousie Physics Department
Lesson 1 - LED S.O.S.!!
Lesson 2 - Photoresistor
Lesson 3 - Servo
Lesson 4 - Analog Joystick
Lesson 5 - Obstacle Avoidance Car
We are open to chat tngrobot@gmail.com
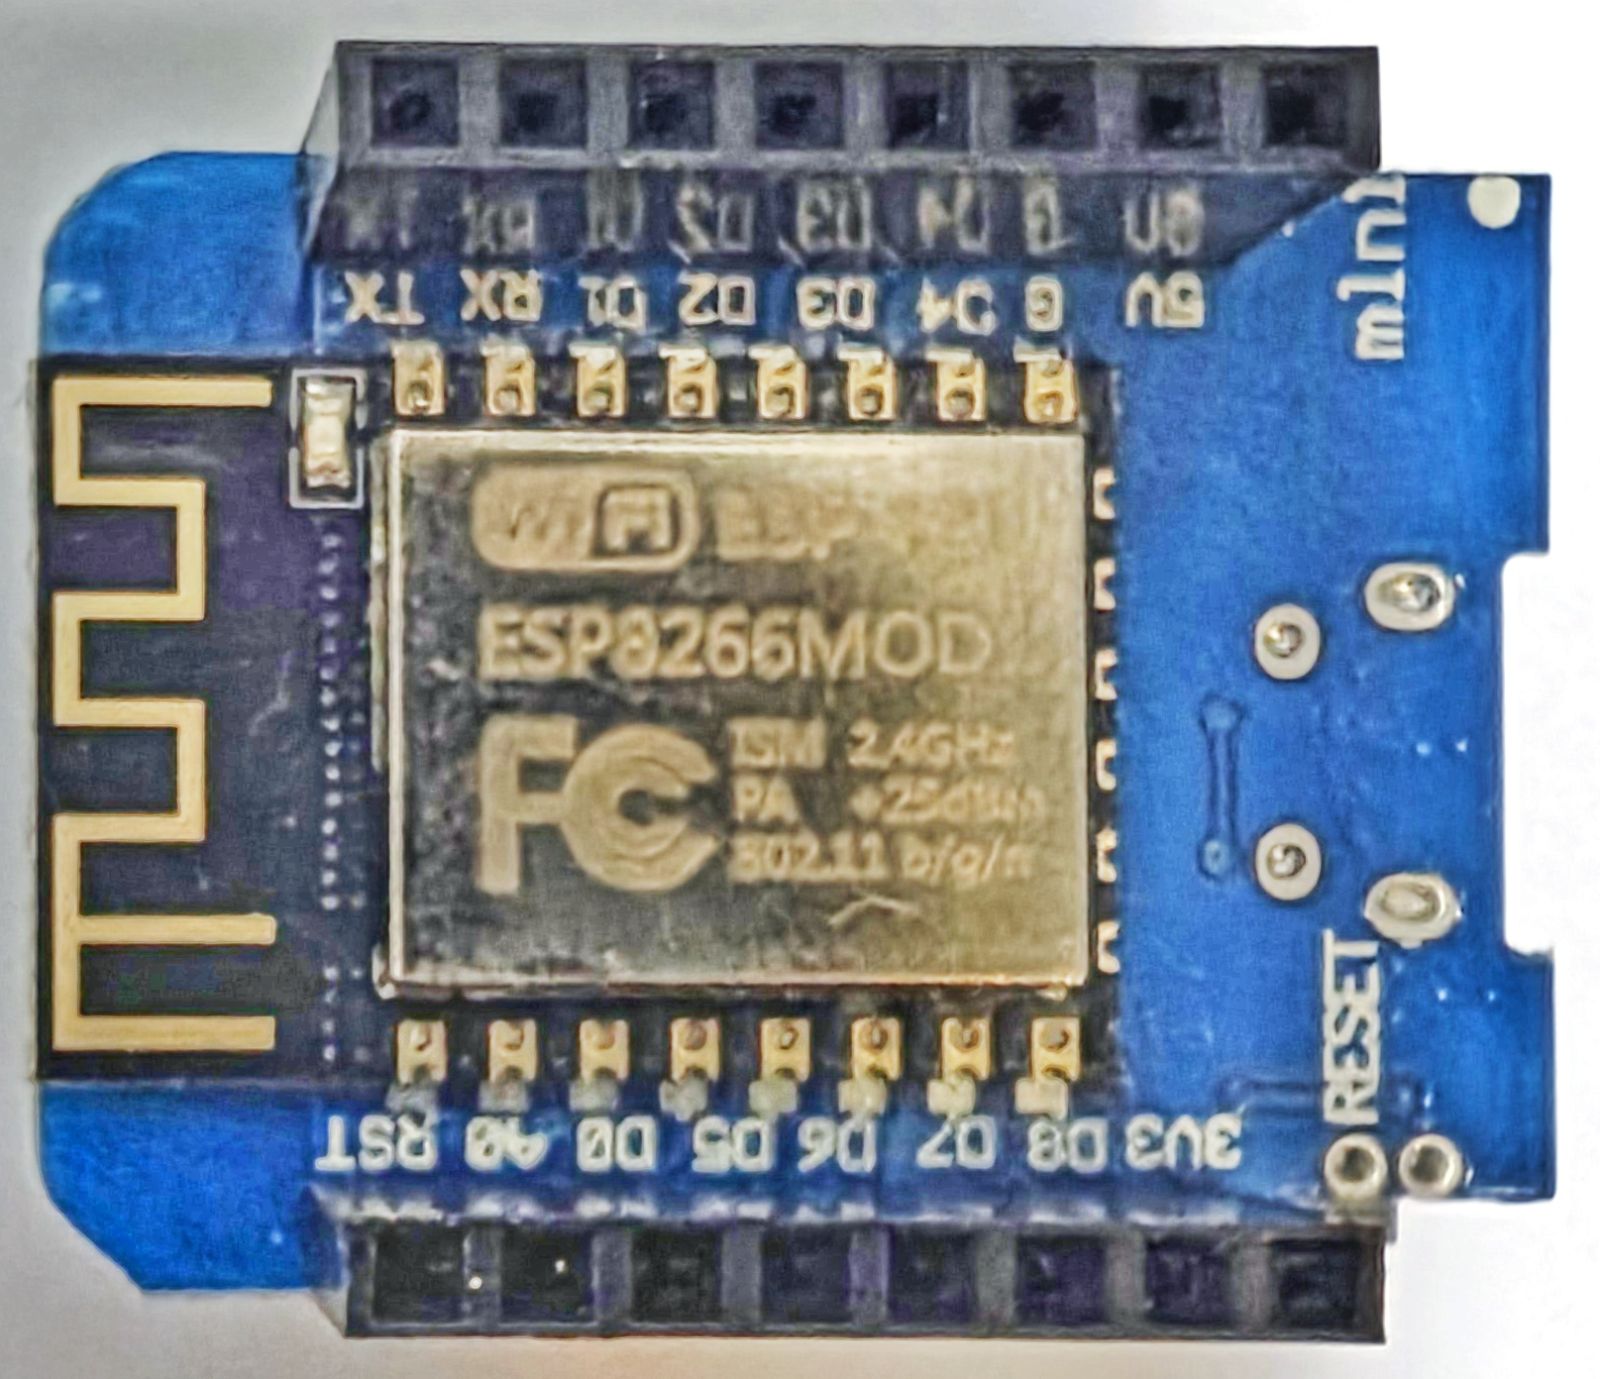
Levels: Students progress through "beginner," "intermediate," "advanced", and "diamond" badge levels, earning badges for mastering different skills. Learn how to build our own robots in micro-based python programming! Let's get started. Check out your Hex Prototype Assembly Design (HexP.A.D.) and HexLink complete with a powerful mini microcontroller the WeMos:
Step 1) Download the Software:
Pin.IN Configures the pin as an input.
Pin.OUT Configures the pin as an output.
Placeholder: Image of How To Connect LED to WeMos
from machine import Pin
from time import sleep

led = Pin(2, Pin.OUT)

while True:
  led.value(not led.value())
  sleep(1)
# LED BLINK EVERY 1-SECOND (Pin 2)
# We start by loading our MicroPython Modules

from machine import Pin      # Import function 'Pin' from Module 'machine'
from time import sleep       # Import function 'sleep' from Module 'time'

led = Pin(2, Pin.OUT)        # Create 'led' variable to turn LED on/off
                             # Pin.OUT sets Pin 2 as an OUTPUT Pin

while True:                  # While the following statements are true, do
  led.value(not led.value()) # Turn the LED value on/off, using 'not' flip
  sleep(1)                   # 1-second delay
Learn how to detect the light level in a room using a Photoresistor! These are sensors for detecting light based on a variable resistance. You can access them using your analog pin (A0) on the Wemos D1 Mini and its built-in ADC (Analog-to-Digital Converter) to read the light level.
Your WeMos D1 Mini's ADC reads values between the range of 0 to 1023, corresponding to 0V to 3.3V.
from machine import ADC
from time import sleep

photoresistor = ADC(0)

while True:
    light = photoresistor.read()
    print("Light Level:", light)
    sleep(0.5)
# READ PHOTORESISTOR ON ADC (Pin A0)
# This method loads only 2 required functions

from machine import ADC     # From Module 'machine' import function 'ADC'
from time import sleep      # From Module 'time' import function 'sleep'

photoresistor = ADC(0)      # Initialize the ADC pin (A0 on WeMos)

while True:
    light = photoresistor.read()  # Read the analog value (0-1023)
    print("Light Level:", light)  # Print the light level to the console
    sleep(0.5)                          # Pause for 0.5 seconds
Turn your LED on/off based on the Photoresistor light level. Use our analog pin (A0) as a switch to toggle our LED.
from machine import ADC, Pin
from time import sleep

photoresistor = ADC(0)
led = Pin(2, Pin.OUT)
THRESHOLD = 300

while True:
    light = photoresistor.read()

    if light  < THRESHOLD:
        led.on()
    else:
        led.off()

    print("Light Level:", light)
    sleep(0.2)
# READ PHOTORESISTOR ON ADC (Pin A0)
# This method loads 3 required functions

from machine import ADC, Pin     # Import from Module 'machine' functions 'ADC, Pin'
from time import sleep           # Import from Module 'time' function 'sleep'

photoresistor = ADC(0)           # Initialize ADC for the photoresistor (A0)
led = Pin(2, Pin.OUT)
                                 # Define the light level threshold
THRESHOLD = 300                  # Adjust based on your environment

while True:
    light = photoresistor.read() # Read light level from photoresistor (0-1023)

    if light < THRESHOLD:        # Check the light level and toggle LED
        led.on()                 # Turn LED on (dark environment)
    else:
        led.off()                # Turn LED off (bright environment)

    print("Light Level:", light) # Print the light level for debugging
    sleep(0.2)                   # Tiny delay to avoid rapid toggling
Turn your LED on/off based on the Web Buttons from a website the WeMos creates and connects to on your local Wi-Fi network. Toggle our LED by the web.
Update the following part in the code below with your Wi-Fi name & password. Replace 'Your-WIFI' with your Wi-Fi's name and 'Your-PASSWORD' with your Wi-Fi's password.
import network
from machine import Pin
import socket

led = Pin(2, Pin.OUT)

ssid = 'your-WIFI'
password = 'your-PASSWORD'
wlan = network.WLAN(network.STA_IF)
wlan.active(True)
wlan.connect(ssid, password)
while not wlan.isconnected():
    pass
print('Connected to Wi-Fi, IP:', wlan.ifconfig()[0])

html = """
<!DOCTYPE html>
<html>
<head>
    <title>LED Control</title>
</head>
<body style='text-align:center;'>
    <h1>Toggle LED</h1>
    <form action="/on"><button>Turn ON</button></form>
    <form action="/off"><button>Turn OFF</button></form>
    <h4>Click twice if needed</h4>
</body>
</html>
"""

addr = socket.getaddrinfo('0.0.0.0', 80)[0][-1]
server = socket.socket()
server.bind(addr)
server.listen(1)
print('Server running...')

while True:
    conn, addr = server.accept()
    request = conn.recv(1024).decode()
    if '/on' in request:
        led.on()
    elif '/off' in request:
        led.off()
    conn.send("HTTP/1.1 200 OK\r\nContent-Type: text/html\r\n\r\n" + html)
    conn.close()
# TURN LED ON/OFF BY WEBSITE BUTTONS
# Load Modules and Functions

import network
from machine import Pin
import socket

# Initialize LED on GPIO2
led = Pin(2, Pin.OUT)

# Connect to Wi-Fi
ssid = 'your-WIFI'
password = 'your-PASSWORD'
wlan = network.WLAN(network.STA_IF)
wlan.active(True)
wlan.connect(ssid, password)
while not wlan.isconnected():
    pass
print('Connected to Wi-Fi, IP:', wlan.ifconfig()[0])

# HTML page
html = """
<!DOCTYPE html>
<html>
<head>
    <title>LED Control</title>
</head>
<body style='text-align:center;'>
    <h1>Toggle LED</h1>
    <form action="/on"><button>Turn ON</button></form>
    <form action="/off"><button>Turn OFF</button></form>
    <h4>Click twice if needed</h4>
</body>
</html>
"""

# Start server
addr = socket.getaddrinfo('0.0.0.0', 80)[0][-1]
server = socket.socket()
server.bind(addr)
server.listen(1)
print('Server running...')

# Handle requests
while True:
    conn, addr = server.accept()
    request = conn.recv(1024).decode()
    if '/on' in request:
        led.on()
    elif '/off' in request:
        led.off()
    conn.send("HTTP/1.1 200 OK\r\nContent-Type: text/html\r\n\r\n" + html)
    conn.close()
Hey!
We think you are pretty cool. Find out why.