In this course students will learn how to code in micro-based Python and build robots. You'll master different skills on your journey into introductory robotics. Let's get started.
Check out your HEXLINK.
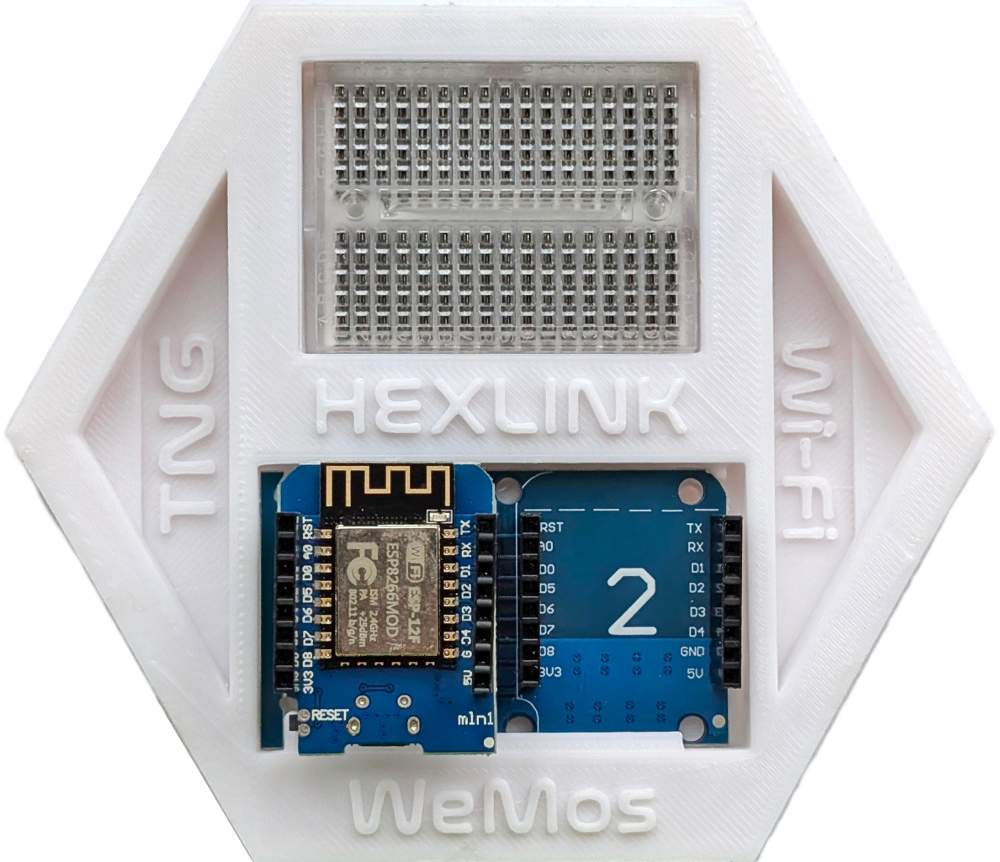
This includes a WeMos, Dual Base, and Breardboard for circuit prototyping.
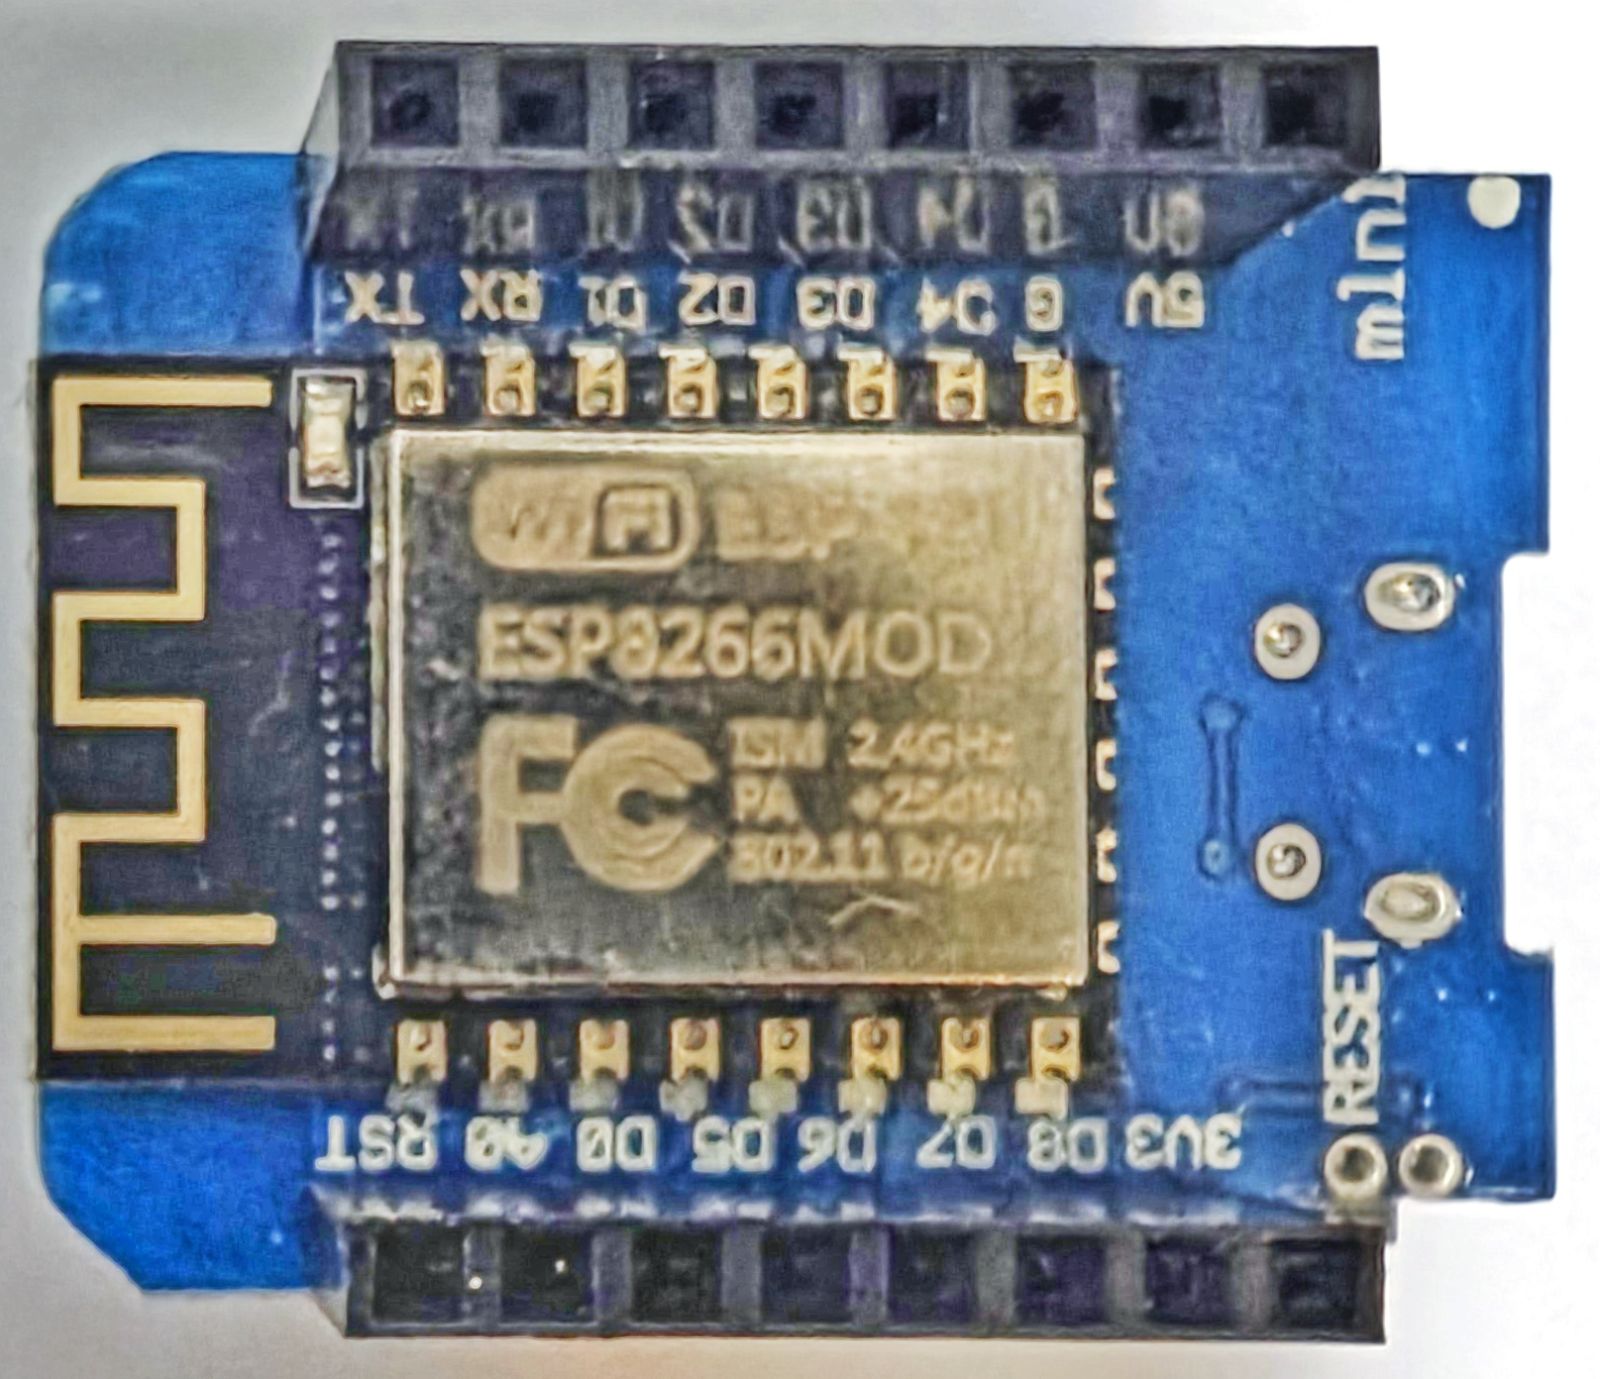
Step 1) Download the Software:
UPyCraft is needed to upload code by USB interface to your Hexlink.
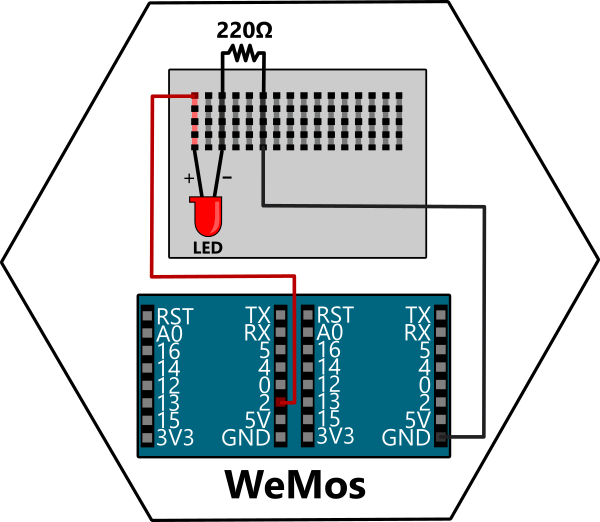
Pin.IN Configures the pin as an input.
Pin.OUT Configures the pin as an output.
from machine import Pin
from time import sleep

led = Pin(2, Pin.OUT)

while True:
  led.value(not led.value())
  sleep(1)
# LED BLINK EVERY 1-SECOND (Pin 2)
# We start by loading our MicroPython Modules

from machine import Pin      # Import function 'Pin' from Module 'machine'
from time import sleep       # Import function 'sleep' from Module 'time'

led = Pin(2, Pin.OUT)        # Create 'led' variable to turn LED on/off
                             # Pin.OUT sets Pin 2 as an OUTPUT Pin

while True:                  # While the following statements are true, do
  led.value(not led.value()) # Turn the LED value on/off, using 'not' flip
  sleep(1)                   # 1-second delay
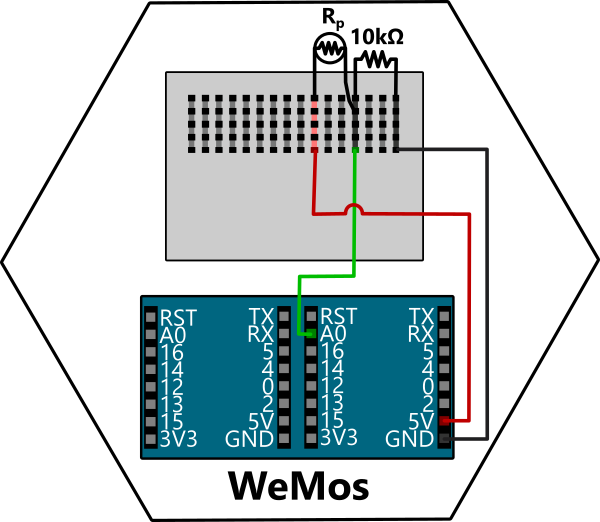
Learn how to detect the light level in a room using a Photoresistor! These are sensors for detecting light based on a variable resistance. You can access them using your analog pin (A0) on the Wemos D1 Mini and its built-in ADC (Analog-to-Digital Converter) to read the light level.
Your WeMos D1 Mini's ADC reads values between the range of 0 to 1023, corresponding to 0V to 3.3V.
from machine import ADC
from time import sleep

photoresistor = ADC(0)

while True:
    light = photoresistor.read()
    print("Light Level:", light)
    sleep(0.5)
# READ PHOTORESISTOR ON ADC (Pin A0)
# This method loads only 2 required functions

from machine import ADC     # From Module 'machine' import function 'ADC'
from time import sleep      # From Module 'time' import function 'sleep'

photoresistor = ADC(0)      # Initialize the ADC pin (A0 on WeMos)

while True:
    light = photoresistor.read()  # Read the analog value (0-1023)
    print("Light Level:", light)  # Print the light level to the console
    sleep(0.5)                          # Pause for 0.5 seconds
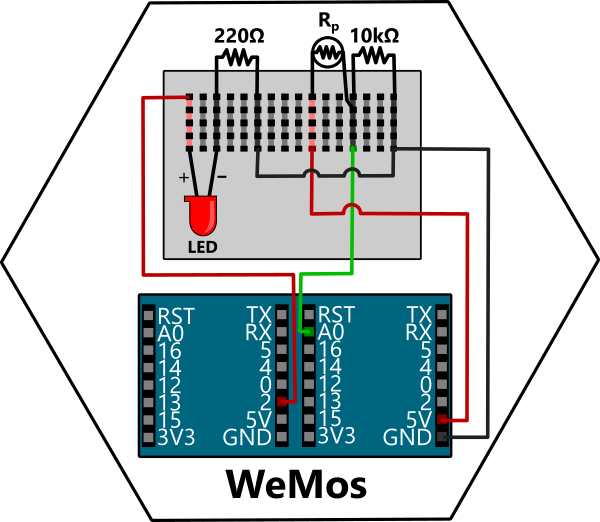
Turn your LED on/off based on the Photoresistor light level. Use our analog pin (A0) as a switch to toggle our LED.
from machine import ADC, Pin
from time import sleep

photoresistor = ADC(0)
led = Pin(2, Pin.OUT)
THRESHOLD = 300

while True:
    light = photoresistor.read()

    if light  < THRESHOLD:
        led.on()
    else:
        led.off()

    print("Light Level:", light)
    sleep(0.2)
# READ PHOTORESISTOR ON ADC (Pin A0)
# This method loads 3 required functions

from machine import ADC, Pin     # Import from Module 'machine' functions 'ADC, Pin'
from time import sleep           # Import from Module 'time' function 'sleep'

photoresistor = ADC(0)           # Initialize ADC for the photoresistor (A0)
led = Pin(2, Pin.OUT)
                                 # Define the light level threshold
THRESHOLD = 300                  # Adjust based on your environment

while True:
    light = photoresistor.read() # Read light level from photoresistor (0-1023)

    if light < THRESHOLD:        # Check the light level and toggle LED
        led.on()                 # Turn LED on (dark environment)
    else:
        led.off()                # Turn LED off (bright environment)

    print("Light Level:", light) # Print the light level for debugging
    sleep(0.2)                   # Tiny delay to avoid rapid toggling
Hey!
We think you are pretty cool.